When you receive your LearningHub Curriculum shell, please review the course settings.
1. Login to your account
2. Click Admin Dashboard

3. Click Courses
4. Select the Curriculum
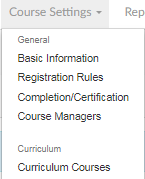
5. Click the Course Settings dropdown

6. Click Basic Information and fill out all the necessary information, including the Course Description, Target Audience, etc.
Course Branding allows you to choose the health authority that best represents the course.

7. Click Registration Rules
8. As the Curriculum is still in the development phase, check that the Course Visibility is set to either Accessible via private link only or Disable Self Registration. This is so that the Curriculum can be created and tested before being accessible to learners.

If you would like for the course to be searchable by learners, change the Course Visibility setting to the first option (Allow self-registration via search) after you have setup the curriculum.
9. Additional Registration restrictions can be added under Registration Options. This includes, adding a passcode or restricting the course to verified employee accounts.

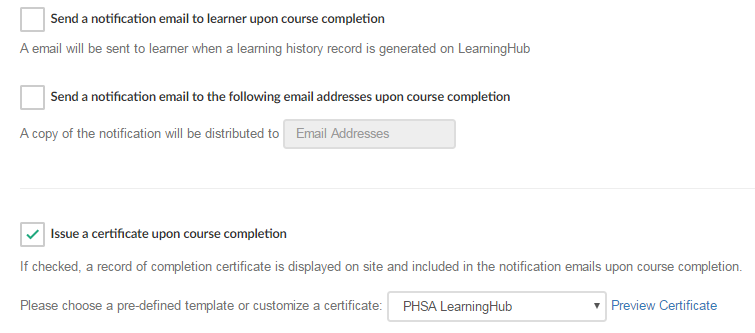
10. Select the Course Completion and Certification options to your preference. Courses that require Recertification should be filled in.
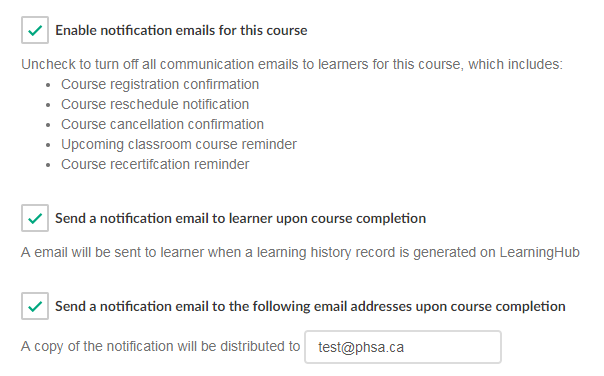
11. Click Notifications and check whether you would like to enable notifications for this course.

12. Click Add Course Managers in Course Managers section
13. For a list of the courses under the Curriculum, click Curriculum Courses

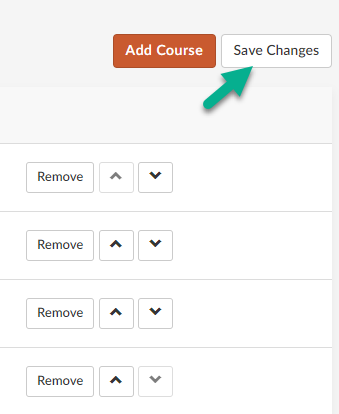
14. Set the Curriculum Enrollment settings and Click Add Course
Enter in the Course ID or Course Title and click Search and then Choose. To change ordering of courses in your curriculum, use the up and down arrows and then click Save Changes.

*Note: Individual courses not owned by you may have different Registration Rules. This may restrict learners' access to those courses. It is important to ensure all curriculum courses have the same Registration Rules as the curriculum.

